VR is a hot topic in the education circles these days, and for good reason. With access increasing and cost decreasing, technology has finally enabled us to use VR in an effective manner to deliver teaching and learning in immersive environments. However, as I mention in my previous blog on OER in the Age of AR and VR, this movement will only be sustainable, beyond the fad stage, if we start thinking beyond pilot projects and actual real-world implementation benefiting the masses.
Some of you might remember my tweets on strapping a 360-degree camera to my head during my first immersive video shoot in Banff, Canada. Following up, I thought I’d tell you how it went.
First, the equipment:
I used a very affordable 360-degree camera (around CAD50) which gave me ample storage, recording time and versatility. The 360fly HD camera could be mounted on many surfaces, was water and snow proof and compatible with GoPro accessories. It also came with a Google Cardboard VR headset which I could use to view my videos instantly through the 360fly mobile app. Additionally, I had my smartphone with a 16MP camera, a cheap mobile phone tripod and a GoPro head mount – which I stopped using after the first couple of curious glares from onlookers. Apart from the smartphone I already had, my total cost for camera equipment was under CAD80.

The shoot:
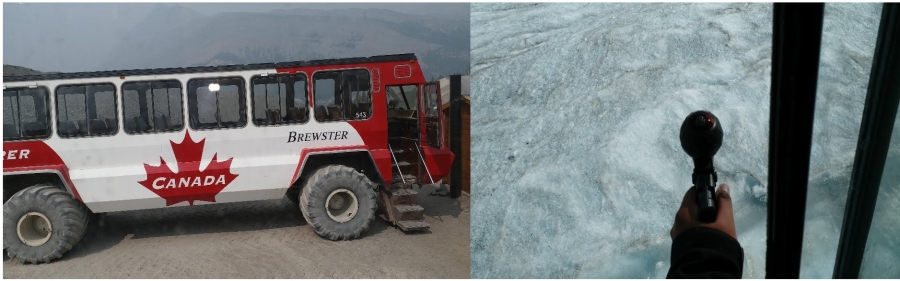
We drove to Alberta in Canada where the beautiful Rocky Mountains are. The idea was to capture immersive videos on the Athabasca Glacier and the Royal Tyrrell Museum because when it comes to VR, stuff from millions of years ago sell better. Obviously, there was a learning curve to using my new 360-degree video equipment. Initially, I had to figure out the directionality of the camera to see which angle records the front. Then the issue of my frame in the video in relation to the surroundings and how to minimize it.
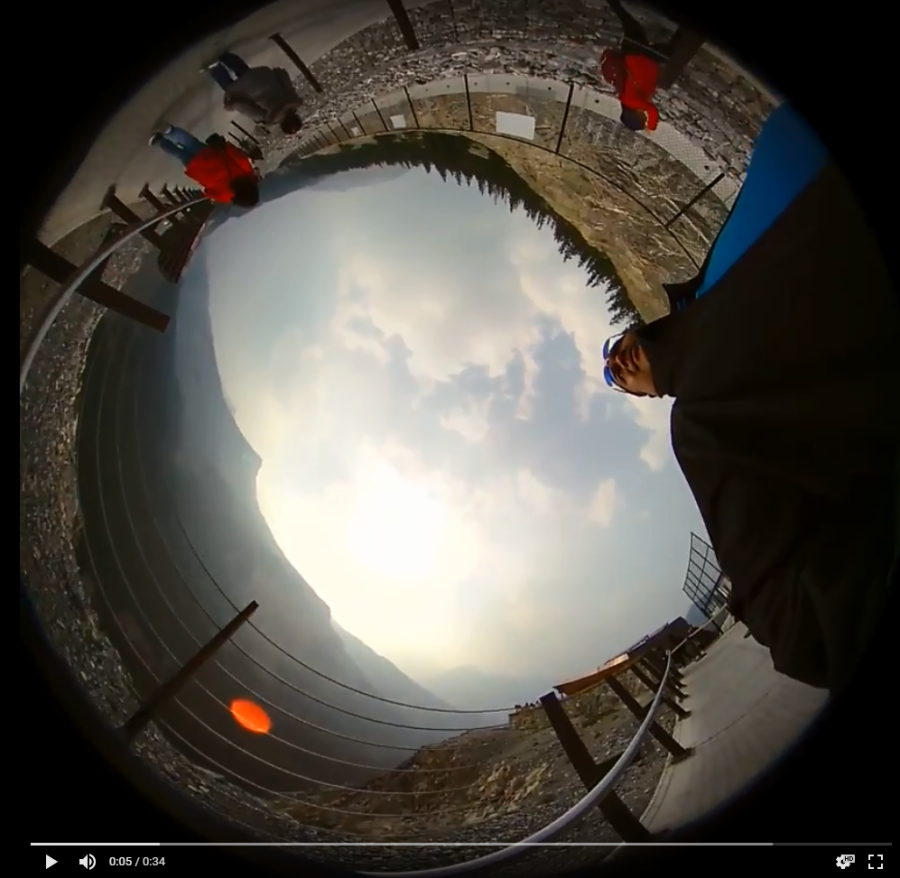
The third was the natural lighting available, which wasn’t ideal due to an overcast day.
However, despite all the challenges, I managed to capture some good footage which can be used in a VR setting. The following are a couple of unedited 360-videos that I have uploaded onto YouTube 360 which allows you to host 360-videos for free. You can watch the following on your screen or in VR mode using a headset.
The next step:
Now that I have some usable video material, I will be editing them using the software provided with the camera to form smaller learning objects. One of the key benefits of using a 360 camera such as 360fly is that you don’t need to stitch videos to form a cohesive 360-experience. The camera does it for you. This is something you might want to consider when you are buying your first 360 camera for a less painful experience.
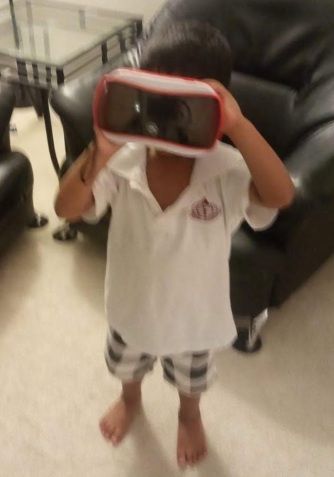
Once the learning objects are ready, I will be consulting a couple of typical end users (my eight year-old daughter and three year-old son) to identify how I can make these into a cool VR experience using the FOSS A-Frame VR platform. At the end of the day, none of this matters if it doesn’t interest the learners.
Based on my personal experience pursuing this new interest in VR, I have realized that augmenting 360-videos with VR is more achievable than creating immersive VR worlds from scratch.
I believe that VR in education would only be sustainable if a Commons is created to pool global resources. To this end, OER in the Age of AR and VR should be given serious consideration if we are to get this new paradigm right the first time.
